Creating a Model 1 Style Web Page with Oracle ADF
You can create Model 1-style web pages that do not rely on the
Struts controller for page navigation in JDeveloper yet still obtain the
advantages of the Oracle Application Development Framework (Oracle ADF)
in your application. When you create Model 1 style JSP or ADF UIX pages
for Oracle ADF:
-
Your pages work with the Oracle ADF data controls to access any
supported business service, including ADF Business Components
-
Your application uses the Oracle ADF lifecycle to provide the hooks
to connect the event of a JSP or UIX page to the business service
-
You can work with the Data Control Palette to quickly assemble
databound web pages
Note: If you choose to create a web application that
has Struts support, refer to
Creating a Struts-based Web Application with Oracle ADF.
To create a Model 1-style web application that works with Oracle ADF:
-
Right-click the Applications node in the
Application Navigator and choose New Ap
plication Workspace.
-
In the Create Application Workspace dialog, name your application.
-
In the Application Template list,
select Web Application (Default - No controller)
and click OK to close the dialog.
Hint: To avoid application errors, it is necessary
to develop the business services and client application in separate
project folders. The JDeveloper application templates will create
separate project folders in your workspace.
-
In the Model project,
create the desired business services.
-
Register the
business services with ADF data controls.
-
With the View project selected, choose F
ile | New to display the New Gallery.
-
Select JSP Page from the
Web Tier - JavaServer Pages (JSP) category of the New Gallery to add a
simple JSP page to the project.
OR
Select Empty UIX XML Page from the
Web Tier - ADF UIX category of the New Gallery to insert a simple ADF
UIX page.
Note: If the New Gallery currently displays all
technologies, do not select the Struts Controller Page Flow item.
When you add Struts support to your project, the design time
enforces Model 2-style JSP pages. In this case, you would work with
the Struts Page Flow Diagram to create action mappings.
-
The page will open in the Visual Editor. Be sure to leave the
Design view selected.
-
From the Data Control
Palette insert a databound UI component into your open web page.
You will use the Data Control Palette in JDeveloper to quickly
assemble your databound pages. For further suggestions about the
pages you can create, see Designing
the User Interface with Oracle ADF Databound Components.
To subclass PageLifeCycle and handle Oracle ADF events:
-
In the Navigator, select your web application project.
-
Choose File | New to
locate the Java Class dialog in the New Gallery.
-
In the Categories list, expand
General and select Simple Files.
-
In the Items list, select
Java Class and click OK to open the Create
Java Class dialog.
-
In the Create Java Class dialog, enter the class name. For example,
MyLifeCycle.
-
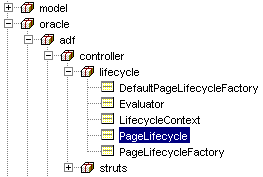
Click Browse next to the
Extends field and locate the PageLifeCycle
class in the Class Browser dialog:
-
Click OK to add the class to your
project. The file opens in the Java Code Editor.
-
Add this import statement to the source code of the lifecycle class:
import oracle.adf.controller.lifecycle.LifecycleContext;
-
Write the event handler code for each operation that you added to
your page from the Data Control Palette.
For example, if you use the Data Control Palette to drop a
setCurrentRowWithKey(String) operation as a button into your page, you
will write an event handler that looks like this:
  public void onSetCurrentRowWithKey(LifecycleContext ctx)

       {

         super.invokeActionBinding(ctx, "setCurrentRowWithKey");

         ctx.setForwardPath("targetPage.jsp");

         ctx.setRedirect(true);

       }


       public void onSubmit(LifecycleContext ctx)

       {

         if (!this.hasErrors(ctx))

           {

             ctx.setForwardPath("targetPage.jsp");

             ctx.setRedirect(true);

           }

       }
To reference the lifecycle class in the web page that needs to handle
the event:
-
In the Navigator, select the web page for which you have created the
custom event handler.
-
Display the Structure window and select
adf:uimodelreference.
-
Open the Property Inspector by choosing V
iew | Property Inspector.
-
In the Property Inspector, select lifecycle
and click the ellipses (...) to the right.
-
In the Lifecycle Class dialog, click Browse
.
-
In the Class Browser, locate your custom lifecycle class and then
click OK.
The first time you insert a databound UI component from the Data Control
Palette into your JSP page:
-
A client binding definition file (
pageNameUIModel.xml
) is created for the web page
-
The
<adf:uimodelreference> tag (defined in the
adftags.jar) is inserted and its model attribute set to
the name of the binding definition
-
A client project definition file (
DataBindings.cpx) is
created which references the Oracle data controls registered with your
application's business services.
The resulting project files, together with the model reference (
${bindings.MyBindingObject.propertyName.attributeName}) in the
databound UI components, permit the web application to access the Oracle
ADF model layer at runtime. For further details, see
About the ADF-Specific Project Files.
At runtime, the inserted UI components are rendered through a
combination of JSTL tags and EL expressions to access the ADF bindings.
You can proceed to customize the appearance of your web page using the
Visual Editor. Because this is a Model 1 web page, you can run the web
page directly from the Application Navigator.
Related topics
For an overview of Oracle ADF:
For details about the Data Control Palette:
For an overview of the differences between Model 2 and Model 1 web pages:
Copyright © 1997, 2004, Oracle.
All rights reserved.