Creating a New Row Using an ADF Iterator Binding

If your business services supports create operation on the data collection, you can use the operation in a web page to insert a new row. The new row will not be created until the user performs a submit operation on the form. Because the default create operation separates create and insert into two steps, the user can return to the previous page (using the Back button) without displaying a blank, new row.

Note: When you work with ADF Business Components as your business service, you can optionally allow in-place inserts into your components. The CreateInsert operation in the action binding editor is available for this purpose. See below for details.

To create a web page that uses a create operation to insert a row:

  1. Create the ADF-enabled web page that you want to design.

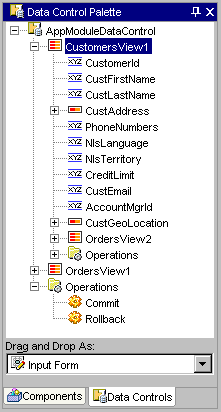
  2. Open the Data Control Palette and select the collection node that contains the attributes you want your table to display. This is the collection to which the page will add the row. Do not change the default selection Read-Only Table in the dropdown list.

    Data Control Palette displays table selection

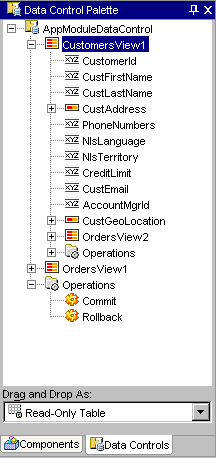
    Note: The data collection you select must not be a detail collection, represented in the data control hierarchy as a child of another collection node. This will ensure that the iterator binding does not perform navigation.

  3. Insert the table into the open web page:

    Visual Editor displays table

    Tip: Optionally, your page can display navigation buttons to the allow the user to browse the collection. When you want to work with navigation, the table and navigation buttons must appear inside a Struts <html:form> element.

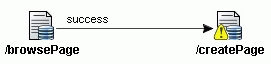
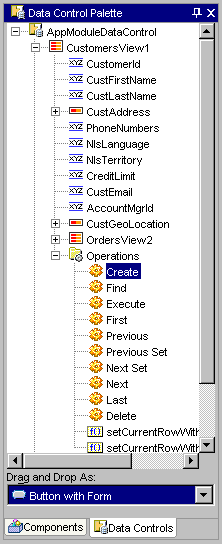
  4. To insert the operation to create the row, select Create in the operations folder for the previously selected collection and select Button with Form from the dropdown list.

    Data Control Palette displays Create operation

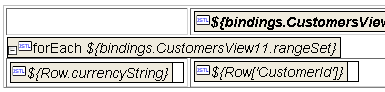
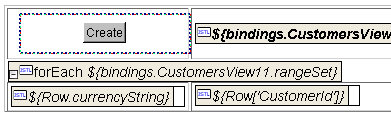
  5. Drag the collection from the Data Control Palette into the first column of the read-only table (so it appears above the forEach statement).

    Visual Editor displays Create button in table

  6. To create a commit button and an HTML form to commit the row creation operation, select Commit from the Operations node folder from the top level of the Data Control Palette and select Button with Form in the dropdown list.

    Data Control Palette displays Commit selection

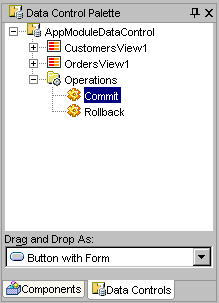
    Note: The Data Control Palette represents operations (such as Commit and Rollback) that apply to all data collections in the current web page's binding context in a folder at the top of the hierarchy.

  7. Insert the button and HTML form into your web page by dragging the selection from the top portion of the Data Control Palette into the open web page. Insert the HTML form below the table. The design view of the Visual Editor will display the button labeled Commit inside an HTML form represented by a dashed box surrounding the button:

    Visual Editor displays Commit button

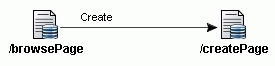
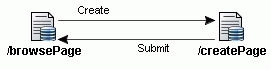
  8. To create the action mapping for the create row page, return to the Struts Page Flow Diagram and complete the following procedure.

To handle the create operation using an insert record form:

  1. Open the page flow diagram and insert a new data page ( /createPage), and draw a forward transition between the two.

    Page flow displays two data pages.

  2. Create the web page for the new data page and drop the same collection as an Input Form from the Data Control Palette.

    Data Control Palette displays Input Form.

  3. Name the page forward transition Create to match the Create operation event name.

    Page flow displays Create transition.

    Note: Starting in JDeveloper 10.1.2, the Create operation does not insert a new row until the user submits it with the response. Optionally, ADF Business Components allows you to both create and insert the new row when in-place row inserting into a table or tree component is desired. When you want to create and insert as one action, edit the button's action binding in the UI Model and choose CreateInsert . You must also rename the page forward transition to match the CreateInsert operation event name.

  4. Add another page forward transition to return to the browse page and name it Submit to match the input form's Submit button event name.

    Page flow displays Submit transition.


About the Oracle ADF Bindings

Limiting Row Fetches Using an ADF Iterator Binding


Copyright © 1997, 2004, Oracle. All rights reserved.